Is it worth the money?

EQ8 review.

 I bought EQ8 because I like designing my own blocks/quilts and wanted to start doing it easier and on a more professional level.

I had tried an earlier version of EQ but it did not do everything I wanted.

I have a friend who has EQ8 but she mainly uses it to audition fabrics, that she scans into the program, to see exactly how her finished quilt will look. But as I said I wanted it so I could design blocks and quilts.

So I purchased EQ8 and have not regretted it one bit.

I have an idea for a block, I open EQ8 and within minutes the block, templates and quilt layout are a reality. I can draw, the block, with straight lines, curves, arcs, I can flip blocks and clone parts of a block ( great when designing applique).

If I have drawn my block as a eg 6x6” but decide I would like it to be 8x8’ or 6x12” I just change the dimensions, at the top of the grid and presto the block is resized.

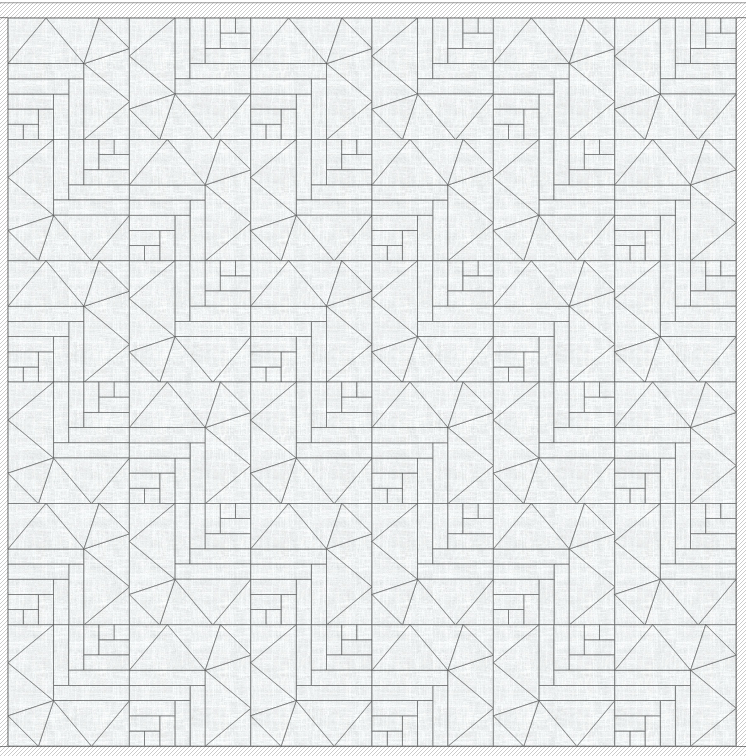
Once I am happy with my block ie size and design I can then put it into a quilt template, choosing exactly how many blocks horizontally and vertically and therefore how big the quilt will be. There are several quilt top templates eg horizontal, on point, baby block, horizontal and vertical strips. I can print the quilt top ready to play with colouring in ( example figure 1) OR I can “colour” in the block using fabric from the fabric library then put it into the quilt to see how it looks. Figure 1

Once I have the block in the quilt I can rotate the blocks either individually or all at the same time. There is also a “symmetry” function that will rotate the blocks in the quilt giving you all possible layout. Figure 2 and 3 are examples of the same block, as used in figure 1, but in different layout. Figure 2

Figure 3

If I am happy with the block and quilt I can then print the templates for the block, with or without seam allowances OR I can print a foundation pattern, if applicable OR rotary cutting instructions, if  when you are using one fabric for the background throughout the quilt. No more buying too little fabric or way too much fabric.

There are tools within EQ8 that I do not use very often but the tools I do use I use all the time so I have definitely got more than my money’s worth out of EQ8. I can see myself using it for many years to come.

If you have any question re how I use EQ8 or if there is something you would like to do in EQ8 but are not sure if it is possible please do not hesitate to ask. If I don’t know the answer I will endeavour to find out for you. EQ8 are also very quick at responding to any questions.

I hope this has been helpful if you have been thinking “is it worth the money?”


Margaret

Did you follow your own advice honey?

Only three sleeps to go.

Have I adhered to my own advice and tips while packing for my upcoming holiday? That would be a yes and a no.

1.     Yes I have used the packing App I wrote about in my previous blog and boy am I glad I have. I am almost at the point of closing the suitcase and locking it confident I have everything, and maybe a bit more, that I will need.

 2.     I have been pinning places and patchwork shops on the Ulmon App, I feel I am going to run out of time as friends just keep mentioning more and more places to see. The map of London is fast becoming very red with pins.

 3.     I have bought a new scarf and I love it. It has all my favourite colours in it so it will go with basically everything I am taking with me.

 4.     I haven’t quite finished packing my handbag but all the important things are in there ie passport and COVID vac certificate and money.

 5.     My sewing I prepped about a month ago so that is sorted. I am so looking forward to getting to the airport and start sewing my new project.

 Our Grandson is heavily into dinosaurs at the moment so I am taking one of his vast collection with me to photograph in various place. He can follow us and his dinosaur on our travels.

One thing I have learnt while packing is no matter how much you plan you will always be running around doing last minute things the day before you leave. And that’s what makes holidays so great, you really need one by the time you go on one. Ha

 Margaret

PS the Tim Tams are for our niece who lives in London. We Aussies do love our Tim Tams.

My top 5 holiday prep tips.

A little prep goes a long way

I am not really an App kind of person BUT these two I find just so helpful when prepping for holidays.

1.    PackTeo. This App suggests things you might need to pack under various heading eg documents, clothing, hygiene, first aid kit, electronics. You can also put items into the “Carry On Bag” section. There is a packing for children suggestion list too. You can personalise the list by add items to the lists as you think of them leading up to the time of actually packing. As you pack you tick of each item ensuring you leave nothing behind.

2.    Ulmon. Offline maps you can access when travelling. In the weeks leading up to departure you pin all the places of interest you want to visit on the city map. Then you can see the proximity of all the attraction so you can plan each day so you don’t miss a thing. Pin the attraction in each city and you are ready to go. Thank you, Heather, for introducing me to these two Apps.

3.    I like to buy a new scarf/wrap for my trip. The scarf can be a light blanket on the plane, a quick shoulder or head cover when going to a church or mosque or a wrap to jazz up a plain t shirt or little black dress. I tend to buy one with a few colours in it so it goes with everything.

4.    I like to prep my travel handbag early, then it is once less thing to do as the trip gets closer. Now I know everyone has their own idea about what constitutes a good handbag, but I will tell you what I love about mine. It has lots of pockets for starters. I always carry my passport in the outside pocket next to my body when I am at the airport. There are two smaller outside pockets on the other side, the top one always has lip balm, tissues, nail file and a small tube of hand cream. The bottom one has two pens, for filling out all the airport paperwork, and some zip ties for our suitcases. We are zip tie people rather than locks. In the main centre compartment of the bag I have my phone, book and glasses. My bag is starting to look a little worse for wear but as I have not found a replacement for it yet it will be coming with me on my next trip next month.

5.    Sewing of course, I am a patchworker after all. I sew at airports, on plane and trains. I like to take enough hand sewing so that I still have some for the flight home. Choosing the blocks and fabrics and cutting out the pieces can take some time so start early. I take all my blocks laid out in a Jen Kingswell Block Wrap so they are nicely contained and ready to be sewn.  Remember no scissors in your carry on but I have never had a problem with needles or pins.  


I love to travel and have missed it over the last two and a half years. In fact I had sort of forgotten how to prep for travel, writing this blog has reminded me that the prepping and anticipation of travel is half the fun.


Remember to “Travel with open eyes, an open heart and an open mind and you will be reward with unforgettable unique memories and experiences.”


Margaret

Do I have enough? Just one more?

sewing packing.jpg

I recently listened to an American Patchwork and Quilting podcast about how patchworkers travel, and it got me thinking. In the podcast they talked about buying fabric, at your destination, that reflects the destination, about taking sewing with you to do in the car, plane and at the destination and about planning your holiday around quilt shops.

Ahh travel, a thing of the past thanks to COVID but I am hopeful to be able to travel again next year even if only within Australia.

As I have mentioned in a previous blog I have made several quilts about holiday destinations I have been to but there is still a problem I ponder each time I am getting ready to go on holiday, “how much sewing should I take or need?” The last thing I want to happen is to run out of sewing and find myself on a 6 hour train journey and no sewing.

Is the calculation 1 block per day or per week or 1 per plane trip or 1 per train trip. I know what you are saying “you can never have too much so just prep more”. But there is the issue of packing it and keeping it organised when you are packing and unpacking when traveling.

So what do I do? Firstly the calculation very much depends on what sort of a holiday you are going on, but I would usually prep at least one block per day and 2 to 4 for the travel to and from. When we Australian’s travel overseas we are usually on the plane for many hours.

When it comes to packing and keeping it all organised, I have a secret weapon, Jen Kingswell’s Block Wrap, https://www.jenkingwelldesigns.com/jens-block-wrap . It has room to lay out 6 blocks, keeps them tidy and ready to be sewn. As you finish a block take if out and lay out the next block therefore you always have 6 blocks at the ready.  The rest of my block pieces I keep in letter size envelopes, well labelled and held together with a sturdy bulldog clip. Needles, tiny cutter and pins are all in a small needle wallet. I then put all these into a well labelled packing cell, neat, tidy and very easy to find in the suitcase.

I have photos of me sewing in all sorts of holiday destination eg Machu Picchu, Antarctica, Uluru. I have had to go into the hotel laundry to iron my block while staff watched on and I have finger pressed many a block until I could access an iron. It has all been fun and I think of all those experiences and places when I look at the blocks.  

I hope this has given you some ideas for your next trip.

Here’s to travel and prepping our sewing and packing it lovingly ready for the big day, departure day.

Happy sewing wherever you are

Margaret

I sometimes cheat, do you?

I sometimes cheat, do you?

I love tips and hacks that make my life easier, whether it’s cleaning, cooking and especially sewing. I believe if there is an easier way of doing something that gives you the same result embrace it. Is that cheating or just being smart with your time? I think definitely the latter.

I also love patchwork blocks on point, like the one below. I love the different pattern that is created when you flip a block onto it’s point. But there is a little more maths involved in this layout than a straight horizontal layout.

So with that in mind I decided to spend a little bit of time now to save time later. I have created a free downloadable cheat sheet for the set-in-triangles and corner triangles for on-point quilt layouts. I have done the maths from 4-inch blocks to 14-inch blocks.

Head over to the “Cheat Sheets” page, on my website, to download the chart for free, I keep mine in a resource folder as well as on my computer, so it is at hand whether I am at home or on a sewing weekend away.

I hope you find the cheat sheet helpful.

Happy sewing

Margaret

Flower Power.JPG

Patchwork hacks for busy sewers.

IMG_7904.1jpg.jpg

I love a good hint or hack that speeds up or makes my sewing easier or tidies my space to make it more user friendly.

I love the way many of the items I am going to share with you were produced for a totally different use.

Hack 1: Freezer paper. When did freezer paper come out of the kitchen and into our craft rooms?  It has two great uses when it comes to patchwork and quilting.  It is great for applique templates and for foundation piecing, my favourite method of patchwork. Freezer paper is readily available through ebay.

Hack 2: File organiser. Designed for office desks to keeps files tidy and organised but perfect for keeping cutting boards and rulers close at hand and ready for use. Officeworks has one at a very reasonable price.

Hack 3: Masking tape. So many uses but my favourite two are as a straight line guide when machine quilting  and to mark my quilting ruler when trimming half-square-triangle block, see Karen Brown’s, Just Get It Done, YouTube. You stick 3 strips of masking tape along the 45 degree line of your ruler creating a channel that sits snuggly against you H-S-T seam. Presto a non-slip ruler. Masking tape, in various widths, is available at hardware stores.

Hack 4: Non-slip matting. This one we are going to use for exactly what it was designed for, to stop things from slipping. Place it under your sewing machine and peddle to stop them from slipping when you are sewing. For $2.80 you can get a roll from Daiso stores.

Hack 5: Hair ties help keep our hair tidy but can also help keep our bobbins tidy.

Hack 6: Small mirrors x 2. Another of Karen Brown’s hacks.   A cheap and quick way to make a “fussy cutting mirror”. The real deal cost around $23 but I bought two mirrors from a Daiso store for $5.60  total, grab some masking tape and tape them together along an edge.

Hack 7: Pencil case. Going away for a couple of days quilting, lucky you, or meeting up with the girls for some sewing? Keep your rotary cutters safe in a pencil case, they will not cut you when you reach into your bag and the blades won’t accidently get nicks in them.

Hack 8: Very small artist easel. When I am sewing one block at a time, so I don’t get confused, I lay out my block on a piece of flannelette, over a board, and place it near my sewing machine, on a very small easel, so I can grab each piece as I need it. Again a $2.80 purchase from Daiso.

IMG_7922.1jpg.jpg


Happy sewing.

Margaret